Menu

Showing posts with label Blogger Topics. Show all posts

How can we run custom PHP file in Blogger


PHP stands for Hypertext Preprocessor. PHP is scripting language, can be useful to create dynamic contents and server side activities.  It can be used in combination with various web template systems, CMS and web frameworks.


Why not in Blogger?

However, Blogger platform is not supporting PHP language and many bloggers facing many difficulties to customize and implementing some new and latest developments.

Nothing to worry, because we will approach a tricky way to run php file in blogger. By applying this steps you can show the PHP file executed output in blogger hosting websites.


How can we run custom PHP file in Blogger?

Though, the results are not 100%, but it is far better than not having a PHP code on your blogger site. In this article, we will learn how to run PHP codes in Blogger.

So now I’m going to share a Step by Step guide to teach all of you How can we run custom PHP file in Blogger Blog.


STEP 1 – Creating A PHP File

For using PHP codes in blogger, You have to create a PHP file in which you have to add your PHP codes which you would like to use. Before save it, You have to check it carefully that file you have created is error free, otherwise designs would not look good.

Below I’ve added a simple example of PHP code for beginners which will give a message of Hello Bloggers.

< ?php echo "Hello Bloggers"; ?>

After creating a file make sure that you are saving it by using .PHP extension. For example : hello-bloggers.php. You can create PHP files using any text editors, I have used visual studio editor.


STEP 2 – Find A Free Hosting Website For PHP Code Files

As I’ve mentioned above blogger platform does not give you the facility of placing PHP files. 

Therefore, you have to either host it on your hosting (if you have) or you can use Google Drive to host them for FREE. You can also use Dropbox, and many other free hosting services but certainly they are not better than the features and reliability of Google Drive.


STEP 3 -Adding PHP Code Link in Blogger

After following above steps, Login to Blogger Account >> Select your blog in which you want to run PHP codes >> select your post/page.

You have to paste the following code anywhere you would like to show the gadget, can be added in Sidebar, Footer, Header, Posts or Pages.


<object data="http://examples.com/php-script/hello-bloggers.php" height="400" type="text/html" width="800"></object>


Don’t forget to replace http://examples.com/php-script/hello-bloggers.php with your PHP file URL that you have uploaded to any hosting site like Google Drive or Dropbox.

That’s it.

Congratulations, Now you have successfully added PHP codes to blogger. Open your blog and see it live on your blogger site. 


Please feel free to comment here if you have any questions.

Add RSS Feed for Blogger

RSS stands for Really Simple Syndication. RSS shows data refers XML files that automatically get update  information from your blog/website.

Users can bookmark the RSS feed URL in their browser. When a user bookmarked your blog's RSS feed, the latest updated information like newly added posts or updated posts will be fetched by a user’s RSS feed reader. RSS feeds the users about the headlines, summaries, update notices, and links back to articles.

In RSS, user will see brief and basic information about the content of your blog. These are posted in chronological order so that the top entry is the latest published entry. This content is distributed in real time, so on the top results the latest published content will be shown to the user.

Create RSS feed on Blogger Blogspot

In blog we can create RSS Feed using Google's Feedburner. Google's Feedburner is essentially an add-on service for your blog that tracks people who subscribe to your blog using RSS

  1. Heads to Google's Feedburner. Feedburner uses your active Google login session from your browser 
  2. Copy and paste your blog home page url into the box. Then click Next. Feedburner automatically identify the Atom URL(XML content) from your given blog url.
  3. Then in the next screen you can create a unique path to your feedburner
  4. That's it, now you can add your RSS link your newly created Feedburner URL to your blog as RSS link.
  5. When the user bookmark your RSS link they will get the updated posts at top.

Hope you can able to add rss feed for blogger. I have added the RSS using these steps in my blog. You can check by bookmarking the RSS Feed link from this blog. You will get the updated posts whenever I update.

Backup and Restore Blogger Template

With Google Blogger, you can either download current theme's HTML template Or you can upload the already downloaded theme, if you want to use an older version of blogger template. Yes, it's possible. Recently, Google Blogger has made some important changes for better blogging. Backup and Restore is one of the new feature added to blogger.

Steps to Download/Upload template in Google Blogger
  • Go to theme
  • To save a copy of your theme, in the top right, click More icon, and then Backup and then Download.
  • Your Blogger template will be downloaded as .xml file

To upload your backup template or your newly created theme, click More icon, and then Restore

If you are using older version of blogger, then follow the below steps
  • Go to Theme
  • In the top right side Click button Backup/Restore


Hope this post will be useful about new features of Blogger. If you have any doubts, please let me know through comments.

Create Breadcrumbs in Blogger

BreadCrumb is a small text path to the current page, located at the top of a page indicating where the user is on the site. BreadCrumb is a kind of navigation menu, that appears in Google search results.

Ex.
home > blogger topic > title

Unfortunately, there is no gadget available in Google Blogger to create breadcrumb. But there are so many tutorials to install a breadcrumb or to modify the template on Blogspot. Most of Blogger has installed Breadcrumbs on their Blog, all based on Label.

Here I am going to show how to create your own breadcrumb on your blogger using labels.
  1. Go to Theme
  2. Click Edit HTML
Now in the HTML find the <div class='blog-posts hfeed'> </div> This element is the top of the page

Copy and paste the below code inside the hfeed element <b:if cond='data:blog.pageName and data:blog.pageType != &quot;static_page&quot;'> <div class='breadcrumbs'> <a href="https://manimuthupandi.blogspot.com/" title="Home">Home</a> > <b:if cond='data:blog.pageName and data:blog.pageType == &quot;item&quot;'> <b:loop values='data:posts' var='post'> <b:loop values='data:post.labels' var='label'> <a expr:href="data:label.url" rel="tag"><data:label.name/></a> </b:loop> </b:loop> </b:if> > <data:blog.pageName/> </div> </b:if>
you can also add the CSS style for your breadcrumb. Here I have added simple style. You can give background color
.breadcrumbs{ padding-bottom: 5px; }
Explanation of the breadcrumb code

1. I have added my Home page link as the first level for breadcrumb <a href="https://manimuthupandi.blogspot.com/" title="Home">Home</a> >
2. Second level for breadcrumb is the Label name of the current page. This boolean condition used to check whether there is a page name and page type is equal to the item. <b:if cond='data:blog.pageName and data:blog.pageType == &quot;item&quot;'> Then looping through eash post. Here post contains only one data. So loop will run one time. Again one loop to get the label of the given post <b:loop values='data:posts' var='post'> <b:loop values='data:post.labels' var='label'> <a expr:href="data:label.url" rel="tag"><data:label.name/></a> </b:loop> </b:loop> This way Label link is created in breadcrumb for second level.

3. Third level of link is current post title, we can show the current post title as <data:blog.pageName/>
Check our blog posts, there you can see the breadcrumb, which is generated using this steps

Create your Own Website using Google Blogger

Using Google Blogger to build your own website is free and simple to use. One of the top website builders, Google Blogger offers a simple approach to develop your own website.

There are numerous available themes for Google Blogger. The theme can even be altered to suit our requirements. The HTML code for the theme can be modified, although working with HTML/CSS requires some knowledge. As may be seen below, Blogger offers a variety of layout options. Choose one for your blog.


The steps to construct a blogger website are listed below.:
  1. Sign in to Blogger.
  2. On the left, click the Down arrow and click New blog.
  3. Enter a suitable name for your blog and click Next
  4. Choose a blog address or URL.
  5. Click Save.
That's it, your Blogger website has now been established.
Do you want to create multilevel navigation drop down menu for your blog. Checkout this post to create Multilevel navigation.

Once you are creating your blogger/website, then you can start creating the  posts and pages.

Create New Post
  1. Click New Post in left side dashboard
  2. Enter your post contents. You can add texts, images, videos,..
  3. Images in your blog blog are stored in Google Album Archive. You can reuse them always.
  4. To check how your post will look when it’s published, click Preview.
  5. Click Save or publish your post
Add labels to your post

You can add labels to manage your posts. These labels used to filter the content they get.
  1. While saving or editing the post on the right, click Labels.
  2. Enter a label name or click an existing label. (To add more than one label to a post, separate labels with commas.)
List Labels group in blog

You can list all the labels on the blog home page.
  1. Go to Layouts
  2. Click Add Gadget and then select Labels (This will show all the labels of posts in your blog)
Now in blogger each label will be shown. When clicking on the label, the respective blog posts will be listed

Manage your blog Comments

All of your posts can have the option to allow comments enabled. On the other side, you can stop comments from being made on a certain page or post. In Blogger, you can control who can comment on your post or page and the types of comments people can leave. 
  1. Go to Layouts
  2. Click Edit on Blog Posts Gadget
  3. Check on Comments to enable Comments
Set up a custom domain for your Blogger website

Your blog is now ready and has a name. The blog name will be something like your given blog name.blogger.com because this is a free blogger. Your blog's URL could be changed to eliminate the extra name (.blogger.com). The internet address for your blog can be customised when you purchase a domain name.
  1. Go to Settings
  2. Publishing section
You can directly buy from Google Blogger or you can set up the third party URL for your blog.
Read this article to know more about setting domain name and SSL in blogger

Enable/Disable Social sharing for blogger post

Social sharing enables user to share the web content to their social media. So that it will be visible to the user's friend connections, groups or even to individual users. The Benefit of Social sharing is to market the web content in different social media.

In blog Social sharing should be enabled, so that the sharing icons will be visible to the users.

In blogger, how to enable/disable Social sharing?

Below are the steps to change the settings

1. Go to layout


2. Edit the main post section


3. Here you can change the settings for social sharing


Uncheck the share button, then social sharing icons will be disappearing from your blog.

Here you can change post related all settings.

Comment below if this post helps you

Happy Blogging..!

Create drop down menu in Blogger

Drop down menu is the first section of your blog/website used to navigate to different pages in your blog. Unfortunately, most blogs at Blogger.com do not have this handy feature. The main problem is that the Blogger does not include the Gadget for drop down menus and most bloggers do not have the programming skills to work with HTML, CSS. All the bloggers are using the default menu available in blogger, but blogger does not have a multi level drop down.

If you want to add multi level drop down menu to your blog, then you have reached the right post. In this post, I will explain with my sample code, to add multi level drop down menu to your blog on Blogger. Knowledge of HTML, CSS is required to understand the code. You can directly copy and use the code. If you have the basics of HTML, CSS, you can create some stunning multi level drop down menu to your blog on Blogger as like in my blog.

Follow the below steps and use my sample code to create multi level dropdown menu in your blog
1. Log in to your Blogger

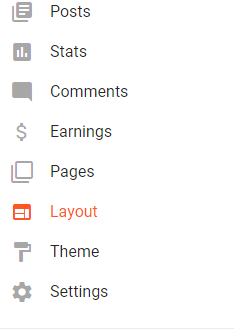
2. Click the "Layout" section of the dashboard:
3. Click "Add a Gadget" from Layout 
                                          

4. Add "HTML/JavaScriptAdd" 
Using this Gadget you can add third-party functionality or other code to your blog.


5. Add the HTML/CSS code 
Place a meaningful title  as "dropdown Menu" and write your custom HTML/CSS code to generate dropdown and then click Save.

Note: If you are familiar with HTML/CSS then you can create various stunning dropdown using this gadget.
Here I have attached my sample HTML/CSS code to create dropdown, you could make use of this.

Below is my own HTML/CSS code to produce multi level drop down menu

<style type="text/css"> .dropdown-section1{ border-radius:3px; width:80%;margin:0 auto; background:#607d8b; height:38px; -webkit-box-shadow: 0 3px 4px 0 rgba(50,50,50,.6); -moz-box-shadow: 0 3px 4px 0 rgba(50,50,50,.6); box-shadow: 0 3px 4px 0 rgba(50,50,50,.6); } .dropdown-section1 .menu li a { color:#fff; font-weight:bold; text-decoration:none; } .dropdown-section1 .menu li { list-style: none; float: left; padding: 10px; background:#607d8b; } .dropdown-section1 .menu li:last-child{ border-right:none !important; } .dropdown-section1 .menu .sub-menu li{ float: none; margin-bottom:0px; padding: 10px; } .dropdown-section1 .sub-menu { display: none; position: absolute; z-index: 100; /* width:100px; */ margin-left: -50px !important; margin-top: 10px !important; } .dropdown-section1 .menu li:hover > .sub-menu { display: block; } .dropdown-section1 .menu li:hover { background:#94c018; } .dropdown-section1 .menu > li { border-right:1px solid #ccc; } .dropdown-section1 .place-right{ left: 206px; top: 30px; } .tabs-inner .widget li a { padding:none !important; font:none !important; } </style> <div class="dropdown-section1"> <ul class="menu"> <li><a href="https://manimuthupandi.blogspot.com/" title="Home">Home</a></li> <li><a href="https://manimuthupandi.blogspot.com/" title="Category">Coose Niche</a></li> <li><a href="https://manimuthupandi.blogspot.com/" title="Category">Create Blog</a></li> <li><a href="https://manimuthupandi.blogspot.com/" title="Category">Moniter Blog</a></li> <li><a href="https://manimuthupandi.blogspot.com/" title="Category">DropDown</a> <ul class="sub-menu"> <li><a href="https://manimuthupandi.blogspot.com/2020/08/create-breadcrumbs-in-blogger.html">Create Breadcrumb</a></li> <li><a href="https://manimuthupandi.blogspot.com/2020/08/backup-and-restore-blogger-template.html">Create Backup</a> <!--ul class="sub-menu place-right"> <li><a href="https://manimuthupandi.blogspot.com/">String</a></li> <li><a href="https://manimuthupandi.blogspot.com/">Array</a></li> <li><a href="https://manimuthupandi.blogspot.com/">Match</a></li> </ul--> </li> <li><a href="https://manimuthupandi.blogspot.com/2020/08/backup-and-restore-blogger-template.html">Contact Me</a> </ul> </li> <li><a href="https://manimuthupandi.blogspot.com/p/about-me.html" title="About Me">Blogger</a></li> <li><a href="https://manimuthupandi.blogspot.com/" title="Contact Me">Reach Me</a></li> </ul> </div>
Output:


Just copy and paste the above code into your blog and change the menu names, it will work. In my blog I have created the multi level drop down menu using this way. If you have any question/suggestion, feel free to comment below.

Happy blogging..!